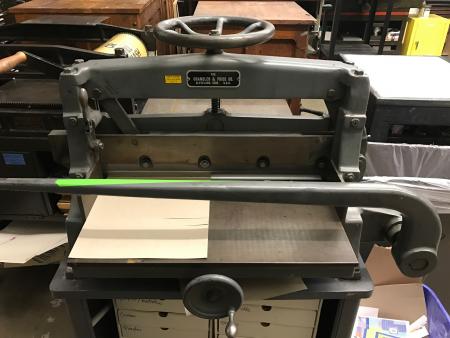
help identifying a chandler & price gang cutter, trying to fix it up a bit
I’m a print lab tech at an art school who is trying to get more information on our gang cutter so I can try and dig up more info on it, but google is not my friend in this arena. I’m including some pics to help since I’m way more conversant in screen printing and fabrication lingo than letterpress…
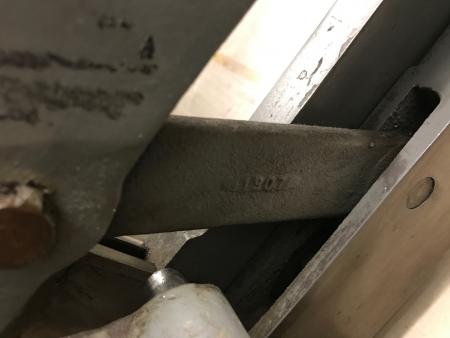
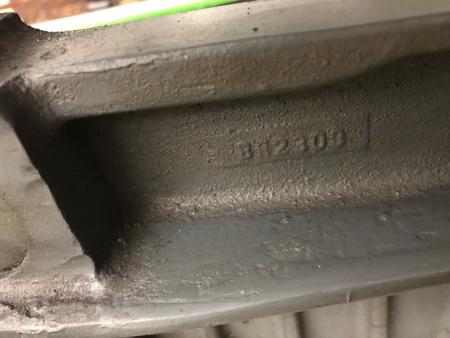
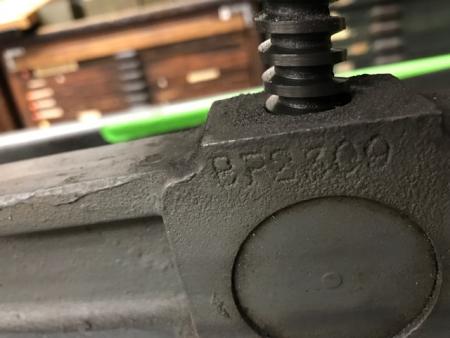
The only identifying marks I could find are some cast numbers on the backside - 1907, and what looks like BP(possibly R)309
It’s in relatively good condition, but I’d like to track down more info on how to get it a tad squarer (it seems like maybe there’s an issue with the threaded rod underneath since every time I square it from the bolts in the back it still wiggles a bit and I know the teachers are tiered of telling the students to pull the left corner toward the person cutting to make it square).
there also is an issue where the blade touches in the right and left corners but there’s a bit of a gap in the center (it was sharpened a year ago by a guy who pretty much only does that kind of sharpening, so i don’t think it was his error, but when I take it in over xmas break I’ll have him double check that its flush). After lurking around here and looking up stuff I checked for the screw posts to micro adjust raising and lowering the blade but instead of there being several like on my challenge diamond cutter that I have at home and others discussed here there are only the two ends (and no matter what orientation I turned them I can’t get the middle to level out). Was working with a new cut stick and doing the 20# paper blade kiss thing, but nothing I’ve tried really works (short of stuffing paper under the cut stick in the middle to raise it to the blade, but I really don’t want a hack solution for something that students use unattended at times….I’m okay with DIY in my own studio, but that’s my choice as I know the risks…I don’t want that in any situation where others could get hurt)
Does anyone A. know a model number for the cutter pictured so that I can be more efficient in my research?
B. have an old manual or know of someone who might have a scanned pdf one lying around? C. any random other help with trying to get this piece of equipment up to snuff, unfortunately any of the people who had info on it are long gone and I’d love to give it some TLC for all the book binders we have coming into the lab now that it’s open to more students.
Thanks in advance!
Tory Franklin
IMG_4007.JPG
IMG_4009.JPG
IMG_4010.JPG
IMG_4011.JPG
It might be worth checking with your college safety advisor and insurance company whether they will permit it to be used by students……..to avoid wasting time on it………….
I had a 23” C&P cutter, and I think the serial number was stamped into the bed. (The other numbers you show are parts numbers.) Over at the Circuitous Root site, I found a link to a list of C&P serial numbers:
https://drive.google.com/file/d/0B52tmX0y_b4PNDY5M2M0MjgtODU5Ny00NDhjLTk...
See page 5 of this pdf for 19-1/2” bench cutters.
When I install a fresh blade or new stick, the stick usually needs a bit of underlay to level the stick with the bed and then level any gaps in the cut. I have strips of bond and tracing paper cut to 1/2” for that purpose.
As Jonathan mentioned, there are absolutely NO SAFETIES on this cutter and the liability is tremendous. Think loss of fingers!!!!!! You really do need to check on that before letting people use it.
Rick
Actually there is a safety—on the left frame upright there is a handle which actuates a blade lock so that the knife block is held in the open position and cannot fall down—or have the handle hit the operator.
This is similar to the safety on Challenge cutters (a pull and twist knob). Not the most air tight thing—in this age of light curtains and all, but probably a whole lot safer than a Ingento style paper cutter (the kind without the safety bar on them).
there is a safety. you cannot lower the blade without pulling the left safety so both hands are on the handles (one operating the cutting lever, one allowing the blade to drop.) it has been part of our equipment for over 30 years and it works well (i used it 20 years ago when i was an undergrad student here), but i want to dial it in more after doing research here for my own cutter. instead of just saying “well its almost square, and you’ll loose your bottom 3 sheets”
my counterpoint in the lab or i are always here when the students are, and the lab is locked when we’re gone so that isn’t the issue, and honestly its a lot safer than half the equipment we have down in sculpture. its also safer than the Kuttrimmer guillotine that doesn’t have a requirement for both hands to be away from the blade, and used to be out in an area of the school with no supervision before we asked to move it in to our lab so there would be a set of eyes upon it. it is always locked up when not in use so a student has to have one of us unlock the cable we added to allow the handle to be raised so we always know its in use. i would never allow students to use something unsafe, but part of artmaking is learning how to use equipment correctly and not be afraid of it (as well as researching when you don’t know, hence why i’m here, because while i’ve been trained in how to use it, i have not been trained on how to trouble shoot and maintain it and since i no longer have access to the person who did i’m reaching out to the best community i could find for that.)
i just am trying to learn as much as possible about it since our old book arts teacher retired and now that lab is umbrella-ed under the rest of the print lab instead of a separate book arts lab run by the design dept vs. the oil and water based print labs which were run by the art department.
thanks parrell_imp - i’ll have to see if we can tip it back when there are more people in the lab and check underneath! I should be able to shanghai both the sculpture techs tomorrow and get this figured out before the blade comes back from the sharpeners!
thanks for the thoughts and sorry for the late reply (winter break just ended.)
Check your blade for trueness by carefully standing the sharp edge on a very flat surface. Your imposing stone if it is in good condition. A piece of glass works well. A hand sharpened blade using a sharpening stone will often have more strokes in the middle than on the ends and thus will have more metal taken off there. If the blade is true and installed correctly and still does not cut well in the middle, shimming up the underside of the cutting stick will work. I never cut the good stock directly against the cutting stick. Rather, I always put a few layers of sacrificial scrap stock under the pile and against the stick.
With that cutter, the blade comes down where it does. You must attempt to adjust the backgage to bring it parallel to the blade. With old and worn equipment there may be only so much adjustment that can be made. That is the case with my old cutter. I need to put two pieces of #67 Bristol stock between one corner of my stock to be cut and the backgage to bring the pile square.
Analyze, improvise and overcome
Check the corners of the bed of the cutter toward operator for serial number.
IMG_4007.JPG