deep relief polymer plates for C&P
Hi
Looking for some advice: Should I be using deep relief polymer plates when printing deep impression to thick card stock on the C&P 10x15 OS?
Using standard polymer plates e.g. Kodak Miraclon DF94 BT (shore hardness 60, relief depth .69mm), in conjunction with much packing and unpacking of the base, taping and untaping of of the trucks and packing and unpacking of the tympan has delivered, at best, inconsistent results when trying to print to Gmund 400gsm cotton paper.
The main problem with deep impression on to thick stock is the shoulder impression, even with consistent ink coverage it will be hard to control. The dealer here in Australia has offered Kodak Miraclon BF170 which features a deeper relief but a shore hardness of 25 - it’s meant for flexo and other applications. I feel that, if it weren’t for the low hardness, it would be ideal for this current application.
What do others do who venture into deep impression on thick cotton stock with polymer plates?
Image attached shows a very bad advertisement for my services.
Andrew
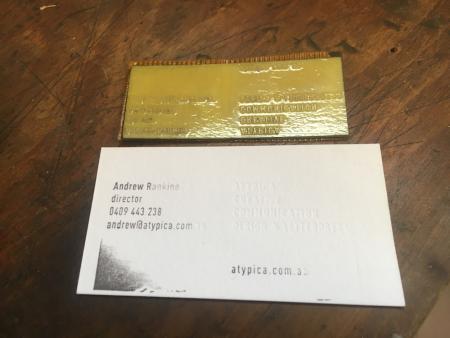
IMG_2305.JPG
Hi,
Seeing that you are getting ink on the background of your plate, I am guessing that it could be one of 2 problems.
1. could be roller height - to low, do you have a roller setting guage? if not a piece of thick rule might do the job. You will need to set the roller height to give you a 2-3mm stripe on the rule or about 1/8 of an inch.
2. If the rollers are set accurately then it mus be down to the base, which with the plate mounted should be .918 of an inch in height. Here in the UK we can get polymer plates at .95 or 1.52 mm in height at the same hardness.
I know on my Adana the rollers are oversize for the trucks and the non printing areas get inked up, but on my Windmill the non printing areas stay clean. Cannot answer the print on thick cotton stock as I don’t print deep impression.
One of the old school I’m afraid, impression down to a minimum.
I notice in your photos that the plate is not entirely washed down to the base in the non-image areas. If there is a very thick layer of polymer left on the base, that could impact you potential inking of the base. If you are getting consistent inking in one corner as pictured, you definitely have a low area in your rails at that point, however, I suspect your results are not that consistent. If you are pressing into the paper the .65mm of your plate relief, and require that depth, there is little you can do but seek a deeper relief plate. Be aware, however, that that may require the purchase of a new base to maintain the plate height at type-high, if you intend to also use the press to print with conventional mounted plates or type forms.
There are some things you can try without changing plates, however. As Frank has mentioned, you can use wide supportive rules to support the rollers at the proper height (as long as you base is accurately milled). You can also stretch a paper sheet over the grippers of the press, imprint it, and cut out the areas being printed, leaving the paper in the areas outside the printed image, thus forming a frisket which serves to take the unwanted impression of the base surface. This frisketing method was used when proofing plates after engraving and prior to routing away the unwanted surface areas when photoengraving.
I think you’ll find these methods help, but you may just have to take less of a bite into the paper unless you switch to the deeper relief plates, which should be available to you somewhere in harder durometers.
John Henry
Cedar Creek Press
Hi Frank & John
Thanks for your comments.
My results are inconsistent and I’m currently waiting on a sample of deeper relief polymer: kf152. I’ll post results. In the meantime I’ll work on roller height consistency.
Andrew
plates are developed in a machine or eg “hand scrubbed”to put it, by self?
Hand scrubbed. I’ve just found that a ceiling edging pad (for painting on a long handle) perfect for the job, but lots of trial and error beforehand.
I tried. Edging pad is too soft and dense. Use Shoe Brush!
I’ll try it. I do find the edging pad good though.
You’ll need to finish developing your plates. The one pictured has not been washed thoroughly - there should be no polymer left on the non-printing areas when done.
Michael
This is what a properly washout plate should look like
00520133.jpg
Little steps.
First pic shows more thorough washing out with the pad; too vigorous - all the full stops have been washed out. Second image shows washout with a shoe brush - better but still the full stops have suffered. Third shot shows partial washout wth the KF152 sample that arrived today: threw it in for the same time - 6 minutes - without testing (tomorrow’s job) and obviously chemistry is different.
Have flipped the images for legibility.
Advice welcomed.
IMG_9834.JPG
IMG_8254.JPG
IMG_1339.JPG
Ahh well, should have renamed the images. 1339: pad; 8254: shoe brush & 9834: KF152 …
Dear Briar-would be so useful to have a magnifying facility so could zoom in on pics like ebay….1crem1…could we have some real close ups please?
Hi 1crem1:
I just wanted to add some comments regarding the question you asked in your original post and provide some advice and encouragement.
The question:
“Should I be using deep relief polymer plates when printing deep impression to thick card stock on the C&P 10x15 OS?”
It is a little confusing. Yes you can print a deep impression with the deep relief plates. But the deep impression has more to do with the type of packing and printing techniques you apply rather than the plate.
The deep relief plates give you a deeper layer of type and image on the plate. This makes these plates a little more forgiving when you use them.
By more forgiving I mean that over or under inking the plate does not have as dramatic an effect as it does on the thinner plates.
I started years ago with KF152 plates and have switched to the thinner plates KF95’s because they give a slightly crisper bite on the impression and hold finer lines. They are a little cheaper and easier to cut too.
I can produce both plates by hand washing - up to about 5x7 that are every bit as good as anything I can buy.
Above that size I send out and for really fine detail I order KF95’s that are laser engraved.
Learning how to develop quality plates, however, has taken an enormous amount of time and effort to develop the process.
I use the boxcar brush for wash out and I also use a fine nylon paint brush from time to time.
A few things I found through trial and error that were critical for successful results:
1) Exposure time and even light distribution are essential.
2) The contact between your negative and plate must be really tight if you want good detail. I now use kreene to ensure the proper seal in my vacuum table.
3) Photopolymer has a shelf life. During this time the exposure latitude will change. So if you have a fresh piece of photopolymer and it comes out great, if you use the same material 2 months later the results may not be the same. Using stale plates caused me all kinds of grief during the learning process.
After I got the exposure and seal of the negative refined I did not find that the actual washout process was that sensitive.
I often send out for plates because of the effort (and cost) it takes, however, being able to do your own is a great asset and allows you to do things you just wouldn’t do if you couldn’t, like last minute changes or quick jobs, or just to experiment.
From looking at the samples it looks to me like the plates are under exposed. Using a shoe brush or a fine paint brush or a boxcar brush in my opinion would all produce the same results.
Good luck…
Thanks dwallen, good advice. I have a mixture of 95 & 152 in small quantities only - still testing before buying a commercial quantity.
In as much as I would like to use metal type, my small collection of it and my desire to use my graphic design skills inclines me towards polymer plates and this necessary process of discovery and refinement.
Nickel plate press’s incomplete washout observation was a revelation and helped me make properly washed out plates.
Likewise, whatever brush I use is overshadowed by how it’s used as, like the ukulele, it’s ‘all in the wrist/hand/finger/etc’: the technique.
I’ll keep experimenting. I’ll work on correct exposure for the kf152 (and commit to ordering a commercial quantity of the appropriate plates) and print up these cards, then on to some more ‘kiss’ work.
If anyone has sourced a decent primer on making polymer plates I’d appreciate knowing of it. I’ve found link useful although he doesn’t indicate the type of plate (unless I’ve missed it):
https://www.youtube.com/watch?v=RWgISP5D8XY
Andrew
McDermid I think I remember have various test exposure advice pages on their website….
Hi 1crem1, another important point when washing out your plates is the temperature of the water. I haven’t used the brand that you are using but with what I’m using if the temp is too high I start losing bits and pieces of the image and the letters get rounded so I always use cool water.Check the instructions that come with your product for correct temp.
Bruce
A general note ( my personal opinion ) on deep relief plates versus shallow relief plates:
1 - at inking: how much forgiveness you want?! If you are inking the backing material, you are way off in your roller set-up. With proper form roller adjustment the relief depth should not matter at all. My set-up is totally non standard: non 0.918” type hight and a base is not even parallel on purpose. So I can’t use the roller height adjusting gauge, can’t tell you the bead thickness. But I believe that I hardly have any dry roller rubber contact to my plate. The contact is mainly in the ink layer on the form rollers. One of my form rollers has a “flat spot”, so when the season changes, I have to lower/raise the rollers to get inking on the “flat spot” too.
2 - impression depth: the shallow relief plates have enough depth to give deep impressions. The difference is in the so called Anvil Effect. The thinner material of a same polymer composition actually appears harder in use because it has a thinner layer to be squishy. That is why the Durometer testing is standardised to 0.25” thickness. If you measure a thin sheet directly, it will show much higher Durometer readings. The type of backing material used makes a big difference in the plate’s performance too. The polyester backing with double faced tape is quite squishy compared to magnetic base and metal backing.
I would, but I am too lazy to retool for the thinner metal backed plate material.
I wonder if bottoming out the shallow relief plate would help with the occasionally cracking of paper between close proximity lines.
Cool water! No wonder my website dots are disappearing. I was washing out at roughly 25-30 degrees C.
Hand-processing your polymer plates should be done with room temperature (or slightly warmer) water, using a soft brush. A soft nail brush from the drug store is a good example.
Avoid hard scrubbing, but also avoid extended time in the water. Expect trial and error.
If you are losing detail, you may be under-exposing.
Michael
www.nickel-plate-press.com
Automated hand-processing:
https://www.facebook.com/louie.dudas.1/posts/255801621596695
Some other goodies are here. You are all welcome to download the documents and ALSO to upload letterpress related documents.
https://www.facebook.com/groups/151253788717854/
Have updated the uv exposure unit and am using kf 152 plates with deep relief base and have surmounted the scuffing problem still getting this as per photo. Other parameters being tested: taping trucks, packing base/tympan. Any thoughts?
IMG_5269.JPG
Just a thought: too much ink? Some discussions point to this first. Lots of trans white btw: pms warm grey.
First examine the clean plate in good lighting and look for any deposits of plastic polymer material around the letters that didn’t get removed during washout. If you see excess polymer there then that could be causing the ink halos in your picture. If the plate looks good then look to the press. If the rollers are too low or the plate is too high then you might get ink on the shoulders of the letters causing the halo. Also, if your trying to get deep impression you might be using too much packing and getting an issue there. I would try adjusting my packing first to make a light kiss impression and see what that looks like and then add more packing until I see the halo and see if that points to a cause.
Bruce
It does appear that the rollers might be set too close to the plate. I also wonder if the consistency of the ink is sufficiently stiff to allow it to just sit on the surface of the characters without being squeezed out to the perimeter. I took a quick look at the above thread and didn’t see what type of ink you are using. Are you using standard printing ink? Or is it rather a block printing ink (which often gives similar results to the ones you are experiencing)?
John Henry
Cedar Creek Press
Have reduced the ink on the disk to a minimum and built up from there. So far so good.
IMG_3258.JPG