Uneven inking
Hello everyone!
Owners of Heidelberg OHT, tell me please!
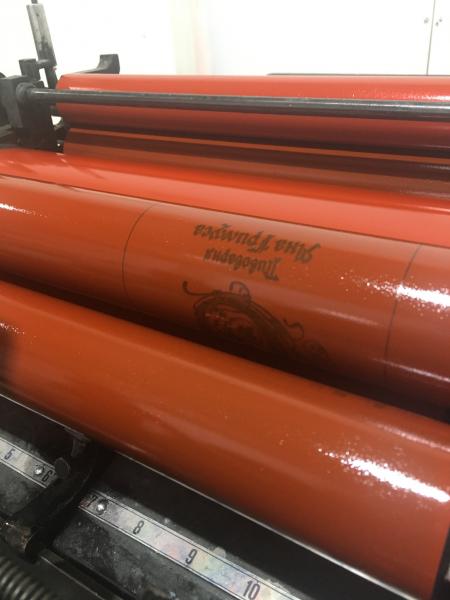
During the print run, I accidentally lifted the ink rollers up. In this way, the rollers did not pick up the ink from the ink cylinder and at the same time transfer the ink onto the paper. And after a few sheets I found this on the rollers … In the photo
I’m wondering - is this normal or not?
Is it normal that only one ink roller gives almost all the ink to the polymer cliché? And the second roller does not seem to touch the cliché at all …
At the same time, I notice that ink transfer seems to have become smaller… Does this mean that the plastic rollers on one of the ink rollers are out of order?
No ink on buttom roller
First something looks wrong here. Maybe it is just the photo. If those are both rollers a cant see how they can clear the frame to print, you would bust and roller arm. If you put the rollers on off pressure latch they would not get ink and thus not print. If the rails are not set right you might get that sort of roller response where only one roller prints. Also that looks like an lot of ink. Maybe post more pictures so we can see what you are doing
Like Western411 is saying this looks really odd. Am I right in thinking you are printing with red ink ? If so you are carrying a lot of ink on the press. Where is the black image coming from ? From wet ink on a previous pass on your sheets. May be a good starting place would be to check your roller height using a roller gage and if they are good check the polymer plate for type height. I will be interested to see how you get on.
> If those are both rollers a cant see how they can clear the frame to print, you would bust and roller arm
I’m not sure if I understood your text correctly … Please clarify what you mean?
> Where is the black image coming from ? From wet ink on a previous pass on your sheets.
Yeap, Yes you are right
>If the rails are not set right you might get that sort of roller response where only one roller prints.
I don’t quite understand how this is possible because it is regulated the height of both rollers at once. It seems to me that the point is that the plastic runners have different diameters. But maybe I’m wrong …
Yes, indeed, there is a lot of red paint on the rollers. But this is apparently due to the fact that one of the rollers was higher and, accordingly, I had to increase the ink supply …
I do not use roller gage due to the fact that I use photopolymers of different thicknesses for printing.
But still, the question remains open … On the upper roller, the paint goes completely to the cliché, but on the lower roller it does not …
Have you run this press before? In the picture the roller what looks like a roller is below the metal frame guide. The rails have 2 bolts one on the bottom and one on the top which allow the rail to be tipped so one roller might hit and one miss. You keep saying “paint”, you are not trying to print using paint are you? The rollers should be rubber not plastic and should be the same size. The roller trucks should also be the same size. This will sound strange but there is a chrome cylinder under the rollers- yes??. There is no reason to use different thickness plates since you still need to reach and print at type high to print.
You keep saying cliche which is not a printing machine part
Definition of cliché
1 : a trite phrase or expression
also : the idea expressed by it
2 : a hackneyed theme, characterization, or situation
3 : something (such as a menu item) that has become overly familiar or commonplace.
Take another picture but step back so we can see more of the press. Also take a picture of the press with the roller arms on the mid position of the chase.
Thank you all very much! I hope here they will be able to suggest a solution to my problem!
Yes, I have been working on it for 3 years already)) But I did not notice that this happened before … Over time, I began to notice that the layer of paint on the cliché became less uniform.
I use Vanson ink so the word “paint” should be read as ink… My mistake. And the word “plastic runners” is worth reading like roller trucks. In my case, they are made of plastic. The inking rollers are of course made of rubber. and the inking cylinder itself is chrome-plated like everyone else))
Speaking of clichés … I use clichés of different thicknesses. It just so happened.
> In the picture the roller what looks like a roller is below the metal frame guide.
Are you talking about a frame that lifts the movable part of the rail?
As I wrote at the beginning, I accidentally lifted the upper part of the rail and after a few prints noticed that the ink was transferred to the cliche only from the upper roller… And I decided that the plastic rollers at the upper roller had worn out over time. At least it seems strange to me.
I use the word cliché for simplicity)) In this case, I print from photopolymer forms with a thickness of 0.95mm
Hopefully the photos will provide some clarity.
xpYPI6qlVbU.jpg
nRgJHgu-RwI.jpg
jJKhVEZ2kSM.jpg
dEntXR6a058.jpg
1yPFYZKGmZ4.jpg
_uZy8S2JZdo.jpg
The roller rails each have 2 screws one at the top and one at the bottom. It they our out of parallel you can create a high spot which case a roller to not perform correctly, one side fights with the other side. If you have lock out rollers move the rollers to the top and lock them out. If not move the rollers to the very top position and stop the press, turn off the power for safety. With the power off the loosen both bolts on one side and move the rail out out so it wont print and then do the same to the other side. Move all 4 bolts slightly and keep a as level a change to each side as possible re lock the nuts and see if it prints. If not retry until the press prints. You want a light roller kiss to the plate and minor change can be made to improve clarity. Type high is .918 at least in the USA. You want to make sure your plate height plus your base height .918. Since you change plate thickness you problem may be your base height. Since you are running to guides the bottom rail screw guide is important to keep a good roller contact. Before you start changing rollers and roller trucks make sure your basic setup is correct. While it is very possible the trucks or ink forms have worn out , it is also possible your rail setup is wrong. In one the picture it also looks like you have blue tape on the rails, you should not need to tape the rails for any reason.
thanks for taking the time to answer my questions! Sometimes I also try to answer if I know right answer))
So…
Thank you for describing the process of adjusting the roller height! But if I understood correctly, then it turns out that in this way both printing rollers are configured simultaneously. Am I right? However, if a pair of plastic runners on upper rubber roller is smaller in diameter than on the other roller … Then it turns out that such a setting does not make sense, because always one of the rubber rollers will be set incorrectly in relation to the printed form… And it seems to me that in this case the following result is obtained - see photo. It can be seen that there is clearly little ink on the printed elements, but at the same time it accumulates at the edges… And I really do not know how to overcome it!
Or do I understand it wrong? It would be nice if someone from the owners of Heidelberg could do the same experiment))
kDIXpjE30DM.jpg
You do need to adjust the rails simultaneously to get both side and the top and bottom of the rails to same point of contact. The roller gauge is what that if for to test for even alignment of type high placement. The rails control the print contact point of the rollers. On other C &P ect. other press types you people using tape but tape is never used on a windmill. Since the rails have 4 adjustment points you can get a great amount of very fine detailed settings. If one side get to much ink especially if ink gets on the base of the plate, raise the rail on that side. As you raise the rail that may now change other side so you may need to lower the other side.
Your inking rollers and the plastic roller trucks should be the same size for both rollers. The inking rollers have the same diameter as do the trucks. Rollers do shrink over time and must be replaced. When you order rollers make sure they understand they are print rollers not the rear distributor rollers as the durometer is different.
To put this a different way, my car has the same size rims and tires on both the front and back axles. Your car ( windmill) has different size rims and tires on each print roller. If that is the case I cant see how you can even print at all much less control what you are printing by fine tuning the rail heights to control the ink contact point. Maybe get 2 new rollers and 4 new Windmill trucks.
The roller trucks should be the same diameter as the rollers to which they are attached. It is possible to run slightly different diameter rollers, but they would have similarly sized trucks.
If you are switching plate thicknesses, you should always make certain to underlay the thinner plates (under the base) to bring them up to type high (.918” in the US). If the height of the form varies, so will the contact with the rollers. You will be chasing this forever. If you make certain the complete height of the form is consistent each time, you will solve many inking difficulties. This is how the roller gauge can be used to set the rollers for proper contact with the face of the plates no matter how thick or thin the plate materials happen to be.
John Henry
Cedar Creek Press
@western411
yes, I think it’s worth ordering new plastic trucks to start …
@jhenry
about underlay… that’s an interesting thought. I should think about it. How do you propose to fix what you put under the base? I recently bought a self-adhesive plastic with a thickness of 0.1 and 0.16 mm. I think it would fit in this case…
But in general I have another metal frame for the base. There is also the base itself made of industrial polyamide plastic. It can be used when switching to other printing forms.
Did you ever resolve this problem? I have the same issue. New runners/trucks. New rollers (matching batch numbers). When using the roller height tool (lollipop), if I get the upper roller where I want it at about 3/32, the lower roller is basically not touching. If I set the lower form at 3/32 then the upper form is way too heavy. Doesn’t seem to matter what I do. I think there’s an issue with imprecise roller cores and or runners/trucks. The previous form rollers which I’ve used since new weren’t much better. I always thought that they weren’t “true” and new ones would resolve things. Alas, not to be.