Vandercook 325G having gripper problems releasing paper.
Hello Everyone-
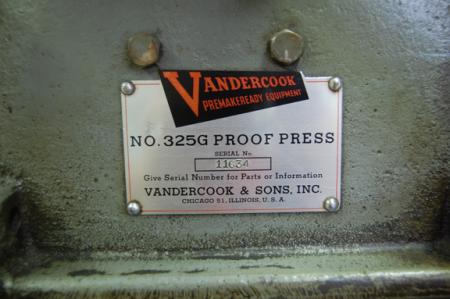
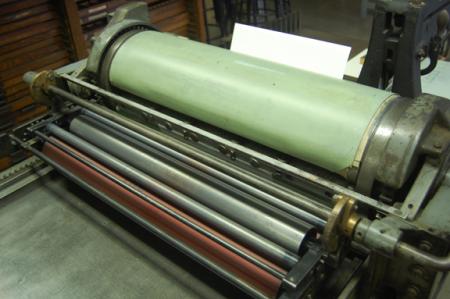
I post this in hopes that someone out there can help me figure out what is going on with this press. I spent a couple fo hours today with steel wool taking out a bunch of rust on my school’s Vandercook 325G in hopes of having it ready to print with for the fall and winter semesters. I cleaned off the bed pretty well, and the press moves like a charm, but when it should be releasing the paper at the cycle’s end, it isn’t, and the grpper heads only come up when you roll the cylinder back to it’s original position.
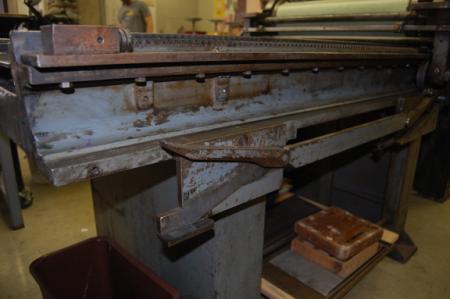
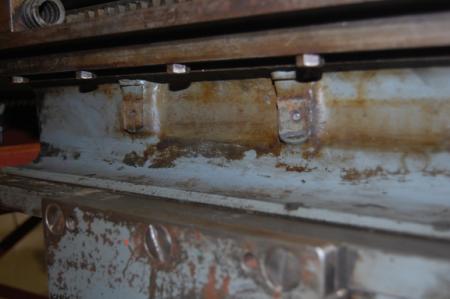
Well, i looked on the other side of the press, and i noticed that there were a couple of holes and a spot that looked like a component was there before. See pics. I printed out a pdf of the 325G manual (thanks Box Car Press!), and it looks like this part is called the “front trip wedge”. We think that this is the reason that we are having this issue. Everything else on this press seems to be working correctly.
Does anyone have any advice?
Another thing- it looks like one of the bolts that was holding this part in place was broken off in the hole (see pics). How does one remove this?
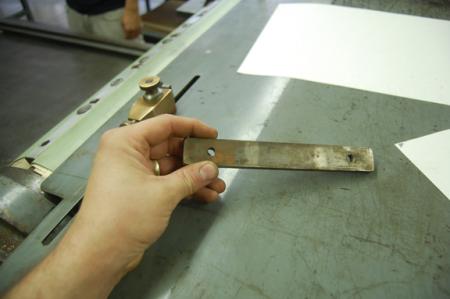
Lastly, i also have attached a pic of a metal plate that has a couple of holes drilled into it. It looks like it could be off of the press, but i have looked in the manual schematics, and can’t seem to see where it goes if in fact it was part of the press. Anyone know what this is? Where it goes??
Any help will ever be so appreciated!! We would love to get this thing printing for the fall! It is a beauty of a press!!
Thanks
Don Kilpatrick
DSC_0028.jpg
DSC_0025.jpg

DSC_0026.jpg

DSC_0029.jpg
DSC_0030.jpg
DSC_0032.jpg
DSC_0033.jpg
DSC_0034.jpg
Yes, you’ve found your culprit. You are fortunate to have the piece as well.
As to the broken bolt, You can try removing it by several methods. First you can sometimes get the bolt to rotate by placing a punch at an angle and tapping with a hammer so as to turn it in the direction required for extraction (counterclockwise).
Another method is to drill it in the center and use a bolt extractor (available at most hardware stores) to catch hold of the bolt and rotate it counterclockwise. You should be able to obtain appropriate bolts for mounting in the same hardware store.
I think the last photo is a bracket to hold the lift plate (LS-154) on the bearing blocks. See Sheet 29.
Also, you should note that the drawings in the manual from Boxcar are for a 320 not a 325. There are a few differences including part names.
Where are you located? I would like to add this press to the Vandercook census. There are 1382 presses listed so far. http://vandercookpress.info/vanderblog/census/
Thanks for the help Jhenry and Paul. And thanks to Sitcky Lips press for answering my question via e-mail as well.
An update- I was able to remove the broken bolt successfully!! Now all i have to do is make a trip to the hardware store tonight on my way home and get replacement bolts! I am so excited at the chance to possibly use this for massive poster prints!!!
To answer your question Paul, this press is at the College for Creative Studies in Detroit. The printmaking section Chair told me that this press was originally used by the Detroit News, and if my memory is correct, was donated to the college. I am excited to be using it after having taught here for nearly three years. I will be teaching a letterpress class for illustrators (working title….), and this press will factor in big time in their creation of illustrated posters.
I will post a picture of my first print from this thing, but first things first, i gotta get that part bolted back on.
Thanks again!
Don Kilpatrick
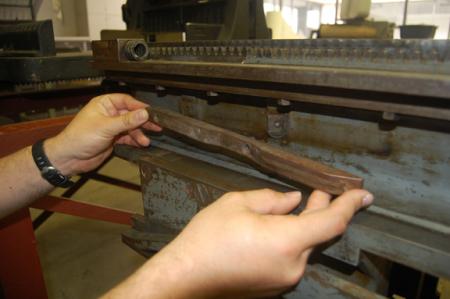
The gripper cam should be installed as you are holding it, with the wedge end toward the feedboard. The two humps allow the grippers to open early for a short sheet, and again for along sheet.
Also, the flipper below the gripper cam shouldn’t be at a 10 o’clock angle as in the picture. It should be resting on the support, and fall there by its own weight. Some cleaning and lubrication may be in order. If it stays where it is, the cylinder won’t trip on the return.
An update-
It worked! I was able to extract the broken bolt (see photo…), and even pulled a proof of a recent lino cut that i did a couple of weeks back. I have attached photos of the press, and photos of one of my students helping me with the cleaning of the school’s 219AB. The 219AB has been painted over, and i am trying to get the serial number, but i noticed a stamp with the inspector’s name with a number next to it. I will take pics of that and post later.
The paper releases nicely with the wedge mounted back on the press. This press is a pain to clean up, but it prints so beautifully!
I did notice where ink transferred to the cylinder near the end, and that concerns me only because this is meant for larger prints. The proof we printed measures 11x17 inches, so it wasn’t affected by this issue. Any thoughts as to why this is? Maybe the trip came off for some reason before i rolled the cylinder? I will post photos of this soon as well.
Thank you, thank you Everyone! I am so excited to see this bad boy in action this upcoming semester!
Best-
Don Kilpatrick
vandercook325_refurb_a_4.jpg
vandercook325_refurb_a_5.jpg
vandercook325_refurb_a_3.jpg
vandercook325_refurb_a.jpg
vandercook325_refurb_a_2.jpg
vandercook325_refurb_aa.jpg
vandercook325_refurb_a_7.jpg
And here is the print-
Thanks again folks!
Don
vandercook325_refurb_a_6.jpg
Your cylinder appears to be over-packed, perhaps so much that it is picking up ink when it is at rest over the inkplate. (Either that or you didn’t fix the hanging trip lever I mentioned before.) Vandercook instructions were: packing plus sheet to be printed should be .003” over bearers. That’s for a traditional kiss impression, so many are using more packing today. But your photo shows considerable difference between bearer and packing. It makes me wonder if you are missing a bedplate, none is shown. All the 325s I have seen, including my own, were .968” galley-height presses; to print from a .918” type-high form, a .050” bed plate is needed.
Cleaning the press is a little easier if you shift the form roller assembly from the front working position to the back position. Lift the rollers with the handle, then lower them again while pulling the crossrod backward into the rear slot. I put the rider assembly over the gap between inkplate and headbar.