How do I register for two colour on a flatbed press?
Hi all,
Quick question: I’d like to achieve a two colour design with this flatbed press. It says ‘Fuditor LTD London’ and distributed by Gollin if anyone is interested.
My current plan is to chalk a border for the galley rack on the bed of the press, then ensure it is in the same place for each print. Also ensure that the chase in the galley rack is tight to the same corner each time.
(I’ve only ever seen it demonstrated with the locked up chase in the gallery rack on the bed of the press for printing. This may have been incorrect).
I’ve also considered taping an outline of the gallery rack with painter’s tape.
Does this sound feasible? Is there a better way?
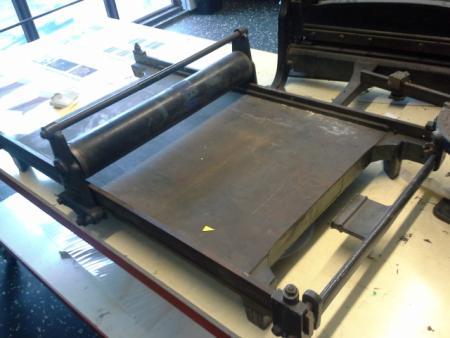
20150119_150448.jpg
This would be my method:
Lock your form into your galley and then lock the galley into the bed of the press. FILL the rest of the bed with furniture, using quoins to lock everything up side-to-side and strong magnets for each end.
Figure out where your paper needs to be positioned over the form. You will need to be able to mark or determine exactly where one side and one end of the paper are on the furniture in your bed. Then you will need to readjust your furniture so that the space between two pieces of this furniture are where the edges of your paper will need to be.
Then get some brass or lead type-high rule and place and lock those into the space between your furniture.
What you now have are two straight edges that you can butt/guide your paper up against as you lay in on your inked form. Pull your impression roller and VOILA!, your image should be in the position you desire on your your sheet. The “register” rules are outside of your sheet so won’t effect your print.
Once you have completed your first color, you can adjust the form for your second color to align where you want it. You may waste a sheet or two getting it aligned, but then you are off and running.
Not exactly a precision method, but it works very well in most cases. This way your paper should be in the same position over the form for each impression. As a BONUS, you can even ink and print in both directions.
Be sure everything is locked-up tight so that nothing shifts around on you.
Hope all of that makes sense.
Rick
I’ve seen some very nice gripper assemblies made from the clasp of a cheap office depot clipboard, mounted to a piece of furniture or other wood.
With a bit of extra effort, you can mount a ruler below the clip to aid adjustments.
Thank you Foolproof, I’ll try out these ideas.
Kimaboe, what a clever idea!
Thank you both for sharing.
*Post removed, go look at Alan’s Flickr for the photo, and have a look around when you’re there for some beautiful stuff :)*
Here is the info on that gripper arrangement and the source of kimaboe’s image.
https://www.flickr.com/photos/alan98/7269227144/in/photostream
DGM
Thank you!
-Kim