Vandercook No. 1 Proof Press
I recently borrowed a Vandercook No. 1 Proof Press and was wondering if anyone knows of someone actively using one? I need some pointers and to see what is missing.
I am trying to find a YouTube video of one in action.
Thank you for any help!
-sb
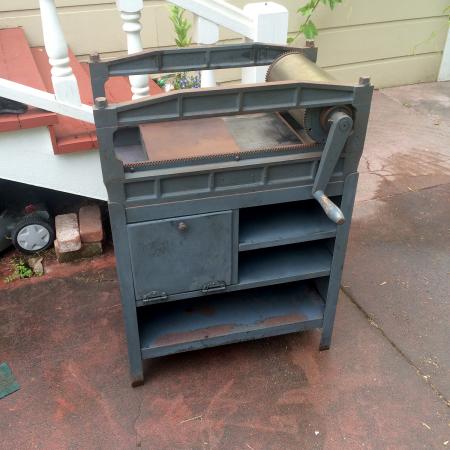
vandercook1.jpg
I’ve got an identical #1. Can’t see anything missing other than the inking plate on the top; attaches to the back rail. These are pretty simple machines. It’s a galley height press and mine has a removable sheet of 0.050” metal on the bed.
In this photo it appears that the impression cylinder is missing its drawsheet and packing. The drawsheet (aka top sheet) needs to extend beyond the cylinder face and taper another 6-8 inches on each end to to wrap underhand around the reels rods (horizontal bars). Secure one end, via the racket and pawl, then insert enough packing sheets beneath to increase the circumference to be approximately level to the cylinder bearers (the outer bands next to the cylinder gears). This is relative to the thickness of the paper to be printed. Secure the other end around the second reel rod. Traditionally, each tympan paper drawsheet and packing sheet are 0.006”. Mylar, which is a good substitute for a drawsheet is available in various thicknesses, but 0.007” is ideal. Packing sheets are availble in various thicknesses in thousandths of an inch.
Arie / Paul Thank you!
I do have the ink plate and also the drawsheet & packing.
I did not realize there was no way to secure one end of the paper that will be printed. Do you just lay the paper over the inked type?
Any photos would be grateful!
[email protected]
Thank you!!!
Yes. That’s the normal way to use this press…just lay the paper over the inked type.
It is possible to rig up a registration system. Some folks have used a thin 3-hole punch mounted at one end of the press; trimming off that part of the paper after the printing is done. I used a 3/4” strip of card stock the same length as the cylinder, folded carefully in half along the long axis and taped at both ends to the tympan with the fold down and parallel to the center of the cylinder. It will hold the paper in place well enough to get fairly good registration. Side registration is a pencil mark on the tympan.
Since there is no trip mode. I recommend a pile of scrap paper to lay over the type on the cylinder return. You probably don’t want to print on the tympan.
My method is similar to Arie’s: I’ve made two chains of rubberbands that wrap around the cylinder and are joined with paperclips. The form is locked in the bed, the paper is held in place by the rubberbands and top placement of the paper is marked with pencil on the tympan.
What are the 4 holes on the base for?
IMG_1963.JPG
…for pins to keep a bed-plate from shifting. See
http://vandercookpress.info/images/1_35.jpg
Pins could also be used to position head and/or tail bars.