Die Cut Edges Showing
Hi All,
I printed all my Christmas Cards today with polymer plates, but there was one image I wanted to use, the positive of the cut pictured below, but the edges keep printing. It sure doesn’t look like the cut is worn down anywhere, nor the edges raised up but I guess it has to be.
What would you all do, if you had to use this cut for a project? My thought was to file down the places where it shows, any other help would be greatly appreciated!!!
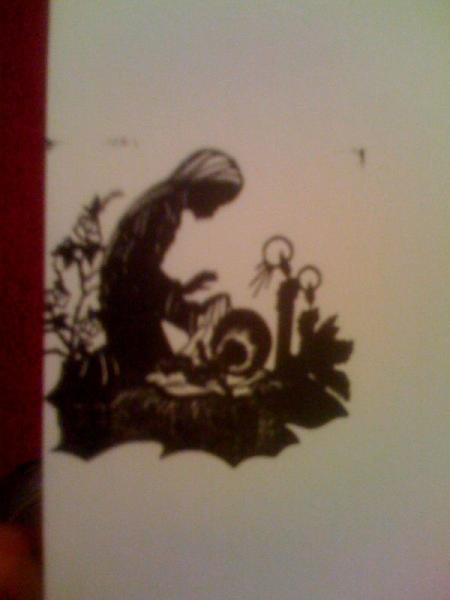
mary cut prob.jpg
Filing would work. Also cutting with jeweler’s shears, tin snips.
My suggestion for a quick fix: If you’re using a platen press use a frisket. See Kelsey’s Printer’s Helper, Polk’s Elementary Platen Presswork, Cleeton and Pitkin’s General Printing and others. If you’re using a proof press friskets won’t work. Good luck!
It’s mounted on wood block, not sure how you could snip it? Maybe die cut isn’t right term, thin metal on wood
Your rollers could be set too low, that may be why they are inking some of the non-image areas. You could try putting a layer or two of tape on the rails to raise the rollers. Or if you have Morgan Expansion Roller trucks, tighten them up a little.
One old trick is to take your exacto knife and stab the point into the background area that prints and give it a twist, this will make a little burr and help keep the rollers from hitting that area, sometimes you have to do this a couple of times, you might get a fine dot printing from this but its better than a larger area printing. the best way is to make a frisket, put a sheet of paper on your grippers and cut out the area that you want to print.
You might be able to just take out all of the packing and then pack ONLY the area under the printing image (not the whole cut). That might separate your sheet from the printing plate enough to avoid the contact.
File the high bits off you want as low a background as poss your rollers height should be right and you may have to work on the back of the plate as i get this funny feeling you are a heavy impression arrangement and to be honest that is the problem !!!
The high spots are probably from when the cut was routed. What I do is take a small nailset and GENTLY tap down the high spots. This takes the risk of a knife or file slipping and cutting the face of the cut. You should also adjust the height
of your rollers because if the edges are inking the rollers are too low.
Paulm
It actually looks like the cut has not been routed. This is a real problem these days, but it just means that you have to either find a shop that has a router, or adjust your press to keep the edges from gathering ink and impressing on the paper. I don’t know what kind of press you are using, but it might also be possible to rig a frisket to protect the printed image.
Paul
The Frisket Worked! But towards the end of the run I was having to shave off tiny fibers of the card stock from around the edges that were fraying and making pin prick marks. I guess I should have used a regular sheet of paper.
Paul, I have a Ben Franklin Gordon.
Thanks to all who replied! I value each and every bit of help I can get!!!
Pilgrim, when i make a frisket i cover the paper with shipping tape, this helps keep the ink from going thru the paper frisket.
5 mil plastic works great for a frisket. When you get ink build up you simply wipe it off the plastic. I use this method when I am serial numbering and want to block out the No.
Good luck and happy printing.