Simple registration method for Poco proof press
I have a Poco “0” (12”x18”) proof press, which I use mostly in its intended capacity for proofing formes before final printing on the Pearl or Potter presses. Earlier this year I stumbled upon this simple method for achieving good register on the Poco:
Around the cylinder (on top of the tympan) I tape a section of graph paper, taking care to align it as perfectly as I can so that the grid is even with the sides of the cylinder. On this graph, I determine where the paper I’m printing on needs to be in order to correctly contact the forme. Using an x-acto knife, I make little slits in the graph paper and slide in the makeshift gauge pins: Book Darts. These archival-quality stainless steel “darts” are meant to mark one’s place on a page in a book. But, because they are very very thin, they work quite well to hold paper against the cylinder of the Poco. If need be, for thicker paper (I’ve used up to 330gsm papers with no problem), you can cut slits in the other side of the grid, to hold the “top” edge of printing paper as well as the “bottom.” Ink the forme, roll the cylinder, and take the newly printed, well-registered paper out of the Book Dart “pins.”
Some helpful hints:
1) Clip the pointed end of the Book Dart back a bit, and it will lie flatter against the cylinder.
2) Tape the Book Darts to the graph paper, and they stay more securely in place.
All best,
Emily
Emily Hancock
St Brigid Press
Afton, Virginia
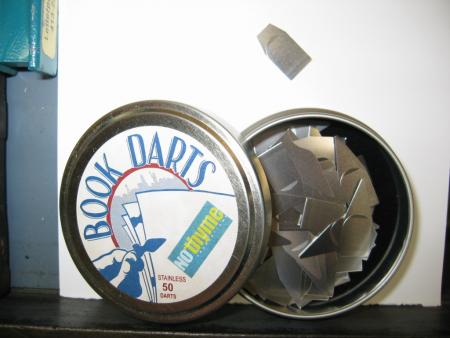
A tin of stainless steel Book Darts
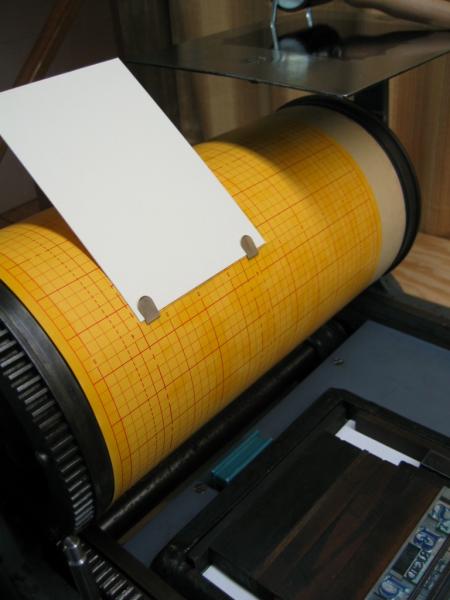
Graph paper on cylinder
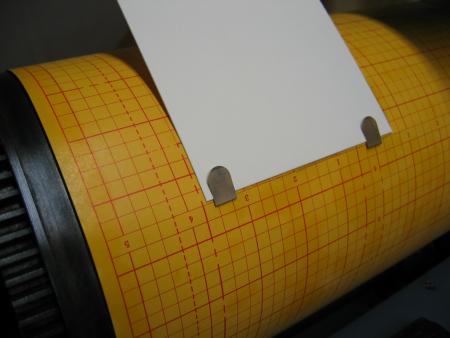
Tucking the Book Darts in slits in the graph paper, and tucking the printing paper in the Darts
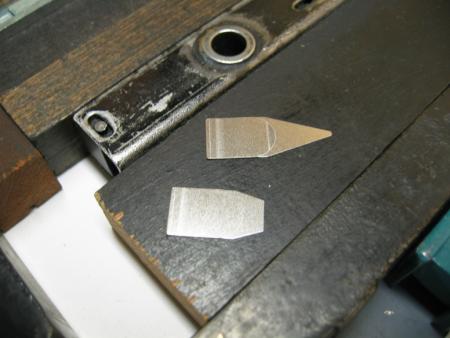
Clip the pointy end of the Book Dart, so that it lies flatter against the cylinder.
Nice, simple solution.
This is great.
that looks like the best system i’ve seen for the poco, good job.
that looks like the best system i’ve seen for the poco, good job.
Oh Oh! Dick’s memory is really slipping.
Nice Emily!
JF
Looks like a great use for all those Baseline layout sheets (for negative stripping for offset printing) that are still floating around (get them while you can though!).
I’ve been doing this for years (using square-style paper clips taped to the cylinder) only when I am printing on something that I cannot punch holes into (envelopes and such). I really prefer to use a pin registration system with the paper pre-punched on one edge (to later be trimmed-off). The pins are taped to the cylinder and act as grippers as well as the registration method.
I have never considered nor had a need to have a grid sheet on the cylinder. I simply have my form locked into the bed of the press and carefully place a sheet of whatever I am intending to print (pre-punched) over the form. I then pull it about halfway through the print cycle so that the paper is pinched between the form and the cylinder. At that time I can place my registration pins in the punched holes and then get the loose paper with the pins (with masking tape already on them to hold them to the cylinder) snugged up the exposed cylinder and then burnish down the tape to hold the pins in place.
I can then either ink-up (or simply use a piece of carbon paper) to pull an impression onto the sheet and see how well or close I came to being in the exact position I am looking for. I am almost always close but usually need a little tweeking. It is then that the form in the bed is moved to the proper possition and relocked.
This method has served me well for 35 years.
Two other observations. With your clips there doesn’t appear to be a side guide so your registration could vary that direction.
AND MOST IMPORTANTLY. There is actually a little bit of ‘slipage’ on a Poco proof press before the gears engage in either direction. I print in both directions (I flip my ink plate up and use the feet at the bottom to hold the stiock to be printed) and even with pin registration it makes a difference if I am going right-to-left or left-to-right. If doing two or more colors that need to register it is extremely important to make sure that the sheet is going in the identicle direction it originally ran through the press for each subsequent color.
I have drying racks and ALWAYS start by going right to left so I can keep my sanity. Any mix-up or error will be quickly detected when you see the rigistration is off by maybe a 1/16” or so.
Hope this makes sense and can be of some help.
Rick
Sounds like a very good system there, too, Rick. Thanks for sharing the nuances of your method.
Yes, adding book darts on the edges for side guides is a good idea sometimes (especially, I have found, with thicker paper).
And exactly right about the slippage and the difference in printing direction! I only print in one direction, using a piece of scrap paper over the forme as I cycle the bed back under the cylinder.
All best,
Emily
This is brilliant. I cant wait to try it. I was just thinking…wouldnt these thin darts work on a platen application? I have a C&P Pilot and would like to use my 9x6 deep relief boxcar base with it but some of my pins will hit with the 9x6 but I havent made the investment on a smaller base as of yet. Do you think this would be safe? especially since the photopolymer would probably be as high if not just higher than these darts against the base? Just a thought.
This specifically for jruprecht
I wander from the subject of the thread, but make these comments for you. With correct trimming of your plate and careful positioning of your pins, you can almost always stay clear of smashing them on the base.
Trim the plate to 1/16” margin and place it on the lower left corner of the base. You will need a very skinny quoin to get between the 6” base and the 6 1/2” chase at the bottom. Alternately, with the Pilot you can lock with quoins only in one direction. I suggest two quoins.
Unless you are trying to print to the edge of your paper, you will clear the pins. If close, remove or push in the tongue. Place pins and close press slowly to look and check.
With the hand operated Pilot, you can make pins of chipboard and glue them to the tympan sheet with rubber cement. It won’t hurt them even if the base hits them.
Get some ink on your shirt.
Emily,
Thanks so much for sharing. I ordered some book darts the other day and I can’t wait to give it a try.
May I ask where you got the large graph paper? Just a local craft store?
Matt
Emily—
http://base-line.com/masking-sheets.asp
Mike, aren’t the masking sheets available in plastic as well as paper? I seem to recall from my offset platemaking days that you could get paper or plastic ruled like that. Seems like the plastic might be a better choice for a cylinder wrap for the Poco.
Bob
Hi Matt and Friends,
The graph paper I use came in a batch of things I acquired with other printing equipment. I use it because it’s what I have on hand. It does have a rather slick/tough surface that is particularly amenable to this application. But I’m sure there are other grids (paper or thin plastic, etc. ) that would work equally well.
Have fun, and let us know how your experiments go!
All best,
Emily
Two other things to add to this thread. I have started using something very similar to Emily’s idea for positioning the paper. Once the stock is in the clips, the tail end of the stock should also be tacked down with a piece of masking tape. The tape should hold out for dozens and dozens of impressions before it looses its useful tack.
The other thing is a “side guide”. Because I often change the packing on my cylinder, the top sheet is usually fairly fresh, so once I have my stock in the exact alignment I m looking for, I simply take a ballpoint or felt-tip pen and draw a line on the top sheet along the edge of the positioned sheet to be printed. This leaves a visible line on the top sheet that I simply slide the stock to be printed up to as a side-guide.
Hope this makes sense.
Rick