Vandercook Proof Press no.1 - cleaning it up
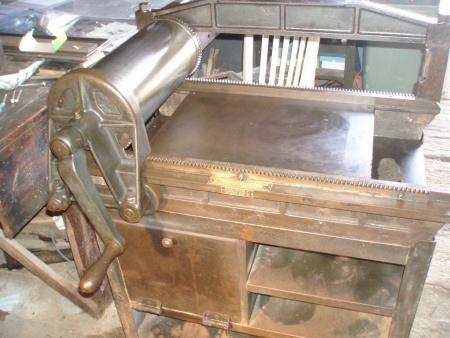
I’ve recently purchased fairly rusty Vandercook no.1 Proof Press and have been trying to clean it up over the last week or so to the best of my abilities. I’ve heard many things, especially contradictory things, about cleaning rust off presses especially the active printing and machinery surfaces. I was hoping that some folks here might have a better idea than I do about going forward on this project.
The press itself works very smoothly and nicely, but has a lot of bare metal that has become brown with rust over time, and a lot of the original paint is gone as well of course. So far its become a lot cleaner and free of most of the surface rust, but much of it is very stubborn and stuck on over the whole surface of the metal, especially on the cast portions of it. Another thing I’ve been wondering about is the possibility of painting it after it has been cleaned in order to keep it from getting rusted in the future.
Any thoughts or advice?

P5072623.JPG
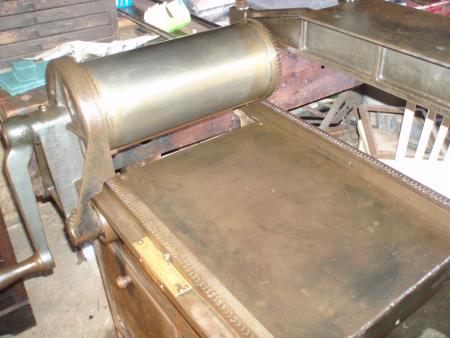
P5072624.JPG
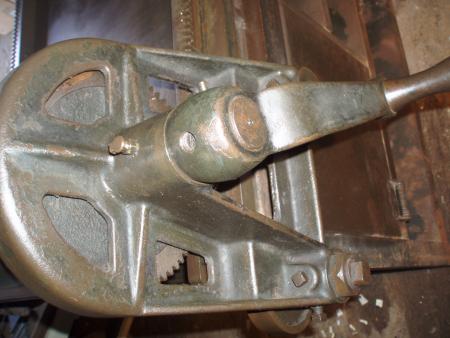
P5072625.JPG
P5072626.JPG
The bed, cylinder, bearers, gears and gear tracks should not be painted. An occasional wipe with a very lightly oiled rag will keep them free of rust if the press is in a climate controlled space and is used regularly.
DGM
Of course, I’d definitely like to keep all the precision pieces as clean as possible so paint’s not an option there. As far as the rest of it goes, maybe. But first thing’s first i’ve gotta get it clean and shiny as much as I can.
Well, maybe.
After the bed, the cylinder, and gears and gear racks are clean, the first thing is to get to printing. Get some ink on paper.
Unless your objective is to have a museum piece and put it on display in your parlor.
I admire cleanliness and as an old sailor, hate rust. Still, the objective is to make pretty prints, not pretty machines.
Get some ink on your shirt.
Inky
Get it clean where needed and adjusted to function well. The rest of the beauty parlor treatment can come later.
That definitely is a good attitude to have, I am especially excited to start printing on it as soon as I can. Would it be preferable to get the rust off the gear contacts and teeth before using it a lot? it doesnt seem to be affecting the usability of the press at least in its current state.
As far as getting it printing, I’ve seen regular vandercooks run, with rollers and the like, but this proof press version does not seem to have the sort of clips that would hold the paper to the cylinder. Is it meant to be run like other proof presses, with the paper directly on top of type?
The gears and the gear racks can be cleaned up with a hand wire brush. This followed by a solvent soaked rag to
wipe up all the debris. Then oil.
The proof press was designed to produce a single proof of type form. It was hand inked with a brayer, a piece of paper was plopped on the inked form and the handle turned. Result: a proof. It was not important that it be square. It went to the proof reader to be marked for corrections as needed. When corrected, a second proof was produced to see that it was correct.
The proof press was not intended to do multiple editions of fine printing.
It evolved and the late models of the powered Vandercooks have become favored by print artists who can produce nice large posters.
Look in the archives here in Briar Press for several methods of producing good register with a basic cylinder proof press.
Get some ink on your shirt
Inky
A thing to watch when using a wire brush is lost wires. I rolled the cylinder over some when cleaning up my rusty 325, and this left scars in the bearers. They are too small to affect printing, but it would have been easy so to blow them out with a blast from the compressor, or just run a galley magnet over the work area if steel wires.
The cylinder came with some ripped tympan paper attached, so I was also wondering if there is a specific way to attach the tympan and packing to the cylinder, if that is the common method for using this type of press as well.
I’ve heard of people using felt or rubber blankets as well, or simply chip board and packing for other types of proof presses to get the necessary depth/impression.
One of the rods that the paper was rolled onto is either stuck due to the rust, or simply tightened still, since theres a screw on one end of it, the second one moves pretty freely, and both have little teeth that seem to be there to stop them from moving in the other direction.