Painted platen bolts. Grr!
So, one of our two C&P Pilots was given a fancy paint job by the previous, previous owner. It appears they even painted over/around the platen bolts as I find them impossible to turn. It looks like the nuts are also missing (compare our Pilot 1 to our Pilot 2).
While I’m guessing I can find nuts to replace the missing ones from T&T Restoration, what are your suggestions for getting the platen screws out without breaking them in their holes? They are very stuck! Would it be in my favor to saturate the bolts with oil or paint thinner in hopes of loosening it up? I know I can’t get to the bolts from the platen-side.
I would just leave them alone, but I’m getting some uneven inking and can’t level my platen properly. I’ve printed a couple jobs on ‘er by adding packing, but it’s not really the most efficient route. I’d much rather use my leveling tool and know I have a level platen than have to build up under my tympan paper for each job.
Any tips are appreciated!
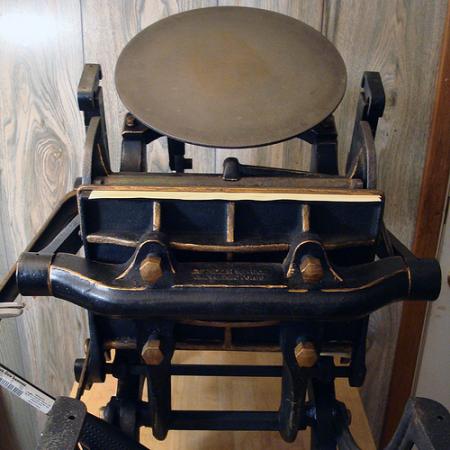
Our painted Pilot (aka Captain Fancypants). Note the bolt heads are painted gold, while the bolts themselves are painted black. I'll try to get a better picture tonight. Note also that the nuts are missing.
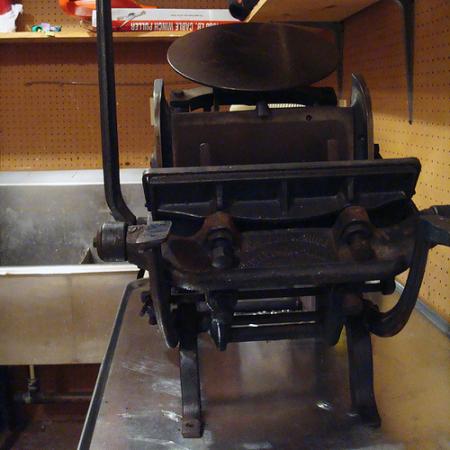
Our unpainted Pilot. Note this one has the nuts and I can adjust the platen without any problems because the bolts are unpainted.
I’m sure Tom from T&T will chime in here too, but he told me just days ago that he is pretty sure that the earliest Pilots didn’t use the lock nuts, and had shorter platen leveling bolts. I have personally had three Oldstyle C&P Pilots without any of the nuts. I had imagined that a previous owner had removed them, but having now seen it so many times I would bet that Tom is right.
My favorite product to get parts un-stuck is PB Blaster.
DGM
Ah! Well, I’m glad to know they’re not missing. Maybe that means our gold-painted friend is even older than our other Pilot. Would they be useful to pick up along with longer leveling bolts?
I’m never sad to end up at a hardware store, so it’s a good excuse to go get some PB Blaster this weekend and give it a try.
Thanks!
I think you should get the PB Blaster, set the platen and see if it stays set as you start to use it. The last one I worked on I did have Tom make me a set of the lock nuts and when the original bolts were correctly set there was just enough thread showing outside of the lugs to make the nuts useful.
On the press I am working on right now I had trouble with one of the leveling bolts and wound up snapping off the head trying to back them all off evenly to pull the platen and add the nuts. I probably should have left well enough alone. It’ll all be fine in the end- thanks to T&T!
DGM
Nifty,
I believe Dan from the Arm in NYC is correct in all of the points he made. The jam nuts may not be necessary and perhaps C & P added them to satisfy general engineering practices at the time; who knows well over a hundred years later. The observation of bolt length is another concern in installing the jam nuts. In addition to the required length to accommodate the nut there is a concern about the absence of a spot face, the area around the threaded hole in the frame to allow the jam nut to bear evenly against the frame. Most every old sand casting is slightly different from the next as well as the preparation for assembly, e.g. flash removal, may not allow the nuts to work well. I recommend not jumping to the addition of the nuts and working your plan to level the platen by freeing up the bolts and making your adjustments.
You mention that the bolts are very tight and the assumption is that the paint is the cause. Keep in mind the delicate balance among all four bolts and it could easily be that the platen is in fact bound by the imbalance of the four bolts (impression screws).
It is a dance of patience to find the sweet spot for each bolt and then move the platen as a whole using a criss-cross process turning each bolt one flat at a time.
This is a great time to plug the use of John’s gauge www.perennialdesigns.net It is indispensible for adjusting any and all platens.
Tom
T and T Press Restoration
www.tandtpressrestoration.com
I think I would start by scratching away the paint at the point where the bolt joins the platen back. This would give the fluid a chance to seep in, where the paint covers the gap now. You should also be prepared for the fact that the bolts might be rusted in, and the previous owner simply cleaned up what was loose and painted over the rest, meanign that there is more than just paint resisting your adjustments.
If you don’t mind messing up the paint, application of heat to the casting can help expand it and loosen up the parts if rusted. Go slow and easy and they will break loose.
John Henry
Cedar Creek Press
I should have mentioned that use of a wire brush will take away the paint at the join of the bolt and casting.
John Henry
Tom, I have a platen leveling tool and am eager to use it. It was in attempting to give the tool a try that I discovered just how ridiculously stuck my impression screws are.
John, I don’t mind messing up the paint at all. Part of me wishes it wasn’t there to begin with, but I’m not motivated at all to take the poor thing apart and completely clean it.
Thanks for all the tips!
mix up some transmission fluid with acetone. 50/50 mix. Snuggly wrap a strip of cloth rag around the where the bolts enter the platen. the rag should be around the bolt, not the platen casting area.
pour/squirt the mix onto the rags until saturated. this will prob work best with press closed. re-apply as needed for a few days. keep the rags very moist. try removing after 3 (the longer the better) days. if no go, heating the platen casting at the bolt area with propane torch should be enough to break them loose.