Inking solids
Hey guys!
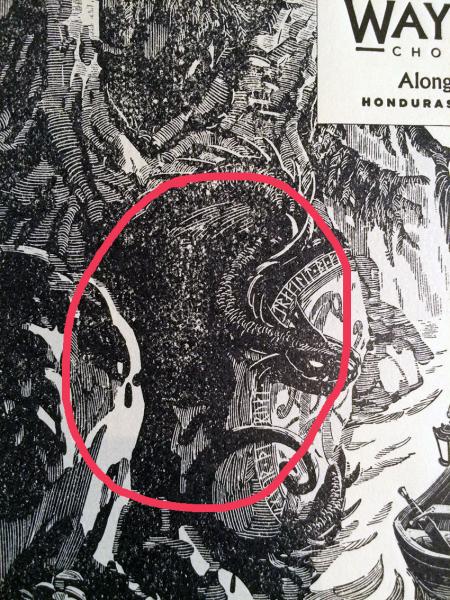
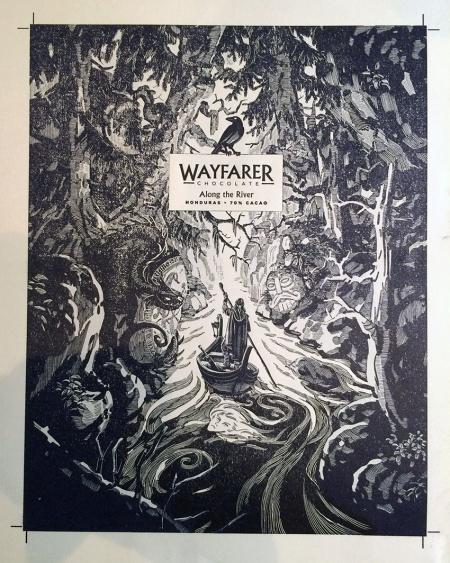
I have some trouble with the inking in my windmill. I’m sure you folks out there can help me solve then. I’m printing this chocolate bar wrapper on 100 gsm uncoated stock. The artwork contains quite large solid areas. In the first run I printed a light blue background, and it came out good. The second color is dark blue, and as you see some parts of the print are uneven and stained.
The printed area is 182 mm x 234 mm (7,16 x 9,21”). I use the steel rider on top of the formrollers and I’ve mixed the ink with some smooth lith. I use van son rubber base-inks.
I’m using guides and have tried to run the sheets twice, but the problem remains. It’s a bit cold in my place, could that be the reason?
Have a look at the images!
Maybe I have to face the fact the windmill is not a proper press for this kind of job. Hopefully not.
The terms I’ve used might not be all correct, as I’m more used to the swedish ones!
/john
IMG_4012.JPG
IMG_4010.JPG
For what it’s worth — I think it looks beautiful as is! Any chance the client might feel the same way? Sometimes “salty” ink is part of what people like about letterpress..more “handmade” feeling..
Probably impractical for a large run but you might try letting the plate get inked twice? To do this continually requires turning the impression and suction on and off a lot, which isn’t easy. But you might try it just to see if it makes a difference! :)
Have you done any makeready under the tympan to give a bit more impression in the darker areas of the image? A careful makeready might solve your problem.
John Henry
Cedar Creek Press
As jhenry said you will need to do some make ready. Large solid areas won’t have the same pressure on them as the light areas so you will have to build up the packing in those places. There are a couple of ways, print a sheet and place it exactly in the right place in the packing so you are increasing the packing thickness and then cut out the light areas or replace a sheet in the packing with a printed sheet and stick tissue on the solid areas that are coming up light.
Thank you all for your kind advice. I have tried all day with make ready on the solid areas.
I also tried to run the sheets two time through the press again. No sucess this time either! The run is 1000 copies so I don’t think inking the plate twice is an option, and isn’t it practically the same as above?
I have made similar jobs before but haven’t had this kind of problem. The stock surface is very smooth so I dont think its because of the paper.
Any last suggestions or advices before I give up?
Did you look at the printing plate/die/artwork? Perhaps that part of the image is suppose to be like that, or not. To my eyes it looks good.
It is hard to understand that if you did a proper makeready as John Henry and platenprinter said, that you couldn’t solve the problem. I would use platenprinter’s second method. Replace a sheet in the packing under the tympan with a printed sheet and secure it in exact position. Then make up some makeready paste (thick flour and water paste, cooked). Start pasting tissue in the problem areas. If one layer isn’t enough, try more. If need be, you can make the successive layers larger or smaller, like the contours on a topographical map.
Are you sure there aren’t any voids in the plate which are causing this?
It looks like there are white spots all over the solid areas of the form, except across the bottom inch or two.. And the bottom has the heaviest ink coverage. You would think that area would be the worst, but it isn’t. Are you sure the impression is not heavier at the bottom?
Skip feed!! it’s the only way to get s descent solid. It’s not hard when you get into the swing of things. I run all of my large solids like this. Just keep one hand on the air and pull impression every second, third fourth swipe. May take longer but the results will be worth it!
Stupid question from an “inking newbie” but is there a compatability issue?
You could consider adding some paste to your ink when you print larger areas or solids.
You could try this: http://www.drucken-und-lernen.de/Detailview.92.0.html?&tx_ttproducts_pi1...
I also skip feed to remedy large solid inking challenges. In addition, you may want to check the height of your form rollers? Sometimes I will cheat a bit and adjust my form rollers a little closer to the form.
That’s a beautiful piece, but 7 x 9 is really getting out to the limits of what a Windmill can do well. I print a number of state postcards that have a solid area of 4 x 6 and 5 x 7 and it’s as much as I care to throw at the machine.
Not sure of the stock, but I would be inclined to add some tack reducer (you may be having “picking” going on. I would also cut the ink a little bit and run the ink a little heavier. Adding 5 to 10 percent of transparent white may improve your ink laydown, but in the end you will need a lot of impression.
Thank you friends! After wasting the whole run I had to take a break for a week and recover with some skiing! When I came back, I continued trying out your advice but nothing worked. I was pretty close to giving up. But bought a piece of 1 mm rubber sheet and packed it under the tympan, and with a maximum amount of ink the result was clearly better. Lesson learned: As Mikefrommontana says, the solid area is to large for a windmill, at least with this dark ink. Next investment will be a Cylinder.
Anyway, thank you all again for your advices! And if you should happen to be curious about what a Stockholm-based letterpress studio is up to, you can always follow us on instagram: @lillatryckeriet.
Ps. The client was very happy!
IMG_4151.JPG
IMG_4149.JPG
IMG_4150.JPG
John:
Was the rubber sheet in addition to the normal packing or did you reduce the packing some?
Arie: I reduced the packing but built up some extra under the logo, raven and the boatman.
VERY NICE! Excellent! Way to persevere, and come up with a creative solution! I am going to write this down so I will have this nugget of “printer wisdom”!
It turned out beautiful!
Carefully built up make-ready using several layers of tissue paper under your draw sheet onto your first sheet of your packing could have done the job probably as well. This is the way we did learn it at school.
Thanks, John. One more question: rubber on top of the made-ready packing?
Not sure is this will work. If you use the rubber packing you may be able to add some blanket save to the rubber packer to build up the image area to want to effect. It is a way we used to fix press blankets with low spots. I have never tired it on the letterpress but an interesting possibility.